How To Lay Wall Tile Straight

Image Result For 12 X 24 Tile Laid Straight Tile Floor Bathroom Wall Colors Bathroom Wall Tile

How To Install A Kitchen Backsplash Wall Of Subway Tiles Laid In A Straight Herringbone Tile Backsplash Herringbone Backsplash Kitchen Kitchen Tiles Backsplash

Wall Tile Pattern Straight Stacked For Behind Vanity Toilet Entire Wall Floor To Ceiling Bathroom Partitions Partition Hardware Basement Bathroom Remodeling

Recent Tile Jobs Englewood Tile Store Mann Tile Inc Vertical Shower Tile Tile Layout Shower Tile

What S The Best Tile Layout For My Bathroom Straight Or Staggered Grey Bathroom Floor Tile Layout Bathroom Flooring

This Is Another Pattern We Do A Lot Straight Herringbone This Is With A 4x10 Subway Herringbone Tile Bathroom Modern Bathroom Remodel Herringbone Tile

Creating guide lines or a grid for your tiles is a handy way to help you make sure that they are straight.
How to lay wall tile straight.

Straight Herringbone Tile Backsplash Tutorial Kitchen Wall Design Patterned Kitchen Tiles Herringbone Tile Backsplash

Instead Of Straight Vertically Laid Tile Go For A Contemporary Look With Staggered Or Brick Laid Tile These Homeowner Shower Tile Brick Laying Mosaic Glass

Straight Lay White Subway Tile Gray Grout White Subway Tile Home Remodeling Groutable Vinyl Tile

Beveled White Subway Tiles In A Straight Set Pattern With Niche Traditional Bathroom Hall Bathroom Kids Bathroom

Tile On The Bathroom Walls Modern Bathroom Bathroom Design White Subway Tiles

Straight Herringbone Tile Backsplash Tutorial Create Enjoy Herringbone Tile Backsplash Kitchen Wall Tiles Cheap Kitchen Remodel

Your Guide To Tile Pattern Layouts Herringbone Tiles Kitchen Herringbone Tile Pattern Floor Tile Design
What S The Best Tile Layout For My Bathroom Straight Or Staggered Bathroom Shower Tile Bathrooms Remodel Bathroom Inspiration

12 X 24 Porcelain Tile 12x24 Tile Tiled Hallway Tile Floor

Master Shower Herringbone Tile Straight Lay Tile Walk In Shower White Tile Gray Grout Hexagon Carrara Marbl Master Shower Herringbone Tile Shower Remodel

Shower Wall Tile 4x16 Marble Subway Tiles In A Straight Lay Shower Wall Tile 4x16 Marble Subway Ti With Images Bathroom Shower Walls Trendy Bathroom Tiles Shower Wall Tile

Ice White Matte 4 X16 Tub Surround Corner Tub Shower Combo Subway Tiles Bathroom Tub Surround

Any Tile Anywhere On Instagram Absolutely Love The Straight Herringbone Pattern With Herringbone Tile Pattern Herringbone Pattern Herringbone Backsplash

The Perfect Level Master Plm Tile Leveling System Allows Anyone To Lay Tiles Straight And Even On Both Floors And Walls Perfect Tiles Flooring Tile Spacers

Bathroom Subway Tile Patterns Google Search White Subway Tile Bathroom Small Bathroom Tiles Grey Bathroom Tiles

7 1 2 X 24 Montpellier Grigo Tile Installed Horizontally On A Straight Pattern On The Wall And Brick On The Floor 6 Guest Bathroom Remodel Tile Installation Bathroom

Tile Patterns Flickr Photo Sharing Tile Layout Tile Floor Patterned Floor Tiles

Tile Pattern Change Upper Tile Diamond Pattern Lower Straight Pattern Decorative Border With Dia Patterned Bathroom Tiles Tile Bathroom Shower Tile Patterns
Https Encrypted Tbn0 Gstatic Com Images Q Tbn 3aand9gcsqkrepfnvrsernxmiyisvpsx8tu4sio27t5dwyaz4bsra16xak Usqp Cau

Woodinville Retreat Shower Wall Tile Shower Tile Designs Shower Tile

What S The Best Tile Layout For My Bathroom Straight Or Staggered Bathroom Tile Designs White Bathroom Tiles Modern Bathroom Tile

Pin By Fireclay Tile On Scandinavian Bathroom Bathroom Design Decor Tile Bathroom Bathroom Tile Inspiration

Image Result For Staggered 12 X24 Floor Tiles Up Wall In Bathroom Large Shower Tile Bathroom Shower Tile Shower Tile

Emser Tile Stadium 12x24 Foundation Porcelain Concrete Stain Cement Grey Silver Modern Contemporary Straight Stack Fl Patterned Floor Tiles Flooring Tile Floor

What S The Best Tile Layout For My Bathroom Straight Or Staggered Long Bathrooms Ideas Bathroom Layout Bathroom Interior
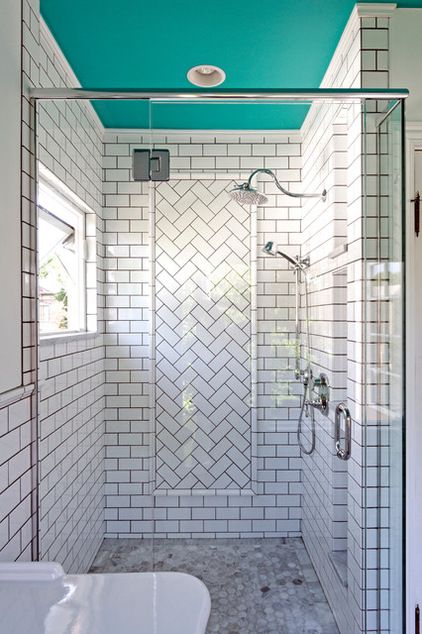
Room Of The Day A Splash Of Turquoise In A Vintage Inspired Bath Bathrooms Remodel Bathroom Design Painted Ceiling

Capozza Photo Gallery Bathroom Flooring Ceramic Tile Floor Bathroom Flooring

Brick Pattern Tile Sale On Tile Patterns Stacked Tile Pattern Patterned Floor Tiles Floor Patterns Brick Laying

Crystile Clear Shower Tub Combination Silver Tile Bathroom Tub Shower

This Bathroom Features 2x4 Tiles In Rosemary In A Horizontal Straight Set Pattern Fireclay Tile Bathroom Tile Inspiration Commercial Kitchen Tile

Which Direction Should You Run Your Tile Flooring Well Designed Patterned Floor Tiles Tile Layout Tile Floor

Rotate Tiles In Small Spaces For Depth And Visual Interest With Images Trendy Bathroom Tiles Tile Layout Patterns Rustic Bathroom Wall Decor

White Subway Tiles In The Shower Clad In Straight Herringbone Pattern Small Bathroom Solutions Small Bathroom Small Bathroom With Tub

What S The Best Tile Layout For My Bathroom Straight Or Staggered Slate Bathroom Modern Bathroom Slate Flooring

Tiling Tips For Walls Bigger Than The Three Of Us Kitchen Wall Tiles Glass Tile Backsplash Kitchen Kitchen Wall

Tile Cti Designer Positive Blanc Satin In 8 X 20 Bathroom Design Kitchen And Bath Kitchen And Bath Design

Pin By Laura Flanders On Bathroom Remodel Best Bathroom Flooring Small Bathroom Bathroom Floor Coverings

12x24 Burano Bianco Valetta With Graystone 542 Grout Installed Horizontally On A Straight Pattern Accent Patter Shower Remodel Bathroom Design Shower Floor

Tile Renaissance 2x2 Hex White Tile Matte Finish In A Straight Lay Daltile Rittenhouse Sq Small Bathroom Remodel Bathroom Tub Shower Bathroom Design Small

Slate Floor White Subway We Would Straight Set Yours Gray Grout Slate Flooring Grey Grout Bathroom Slate Bathroom Floor

Gorgeous Variations On Laying Subway Tile White Marble Backsplash Tile Bathroom Subway Tile

Traditions 3 X 6 Wall Tile In Tender Gray Wall Tiles Tiles Ceramic Subway Tile

Bathroom With Concrete Effect Porcelain Tiles On The Floor And Matt White Tiles Laid Straight Bond On The Wall A Cher Tiled Bath Panel Timber Tiles Bath Panel
Https Encrypted Tbn0 Gstatic Com Images Q Tbn 3aand9gcriziqidxztmmolnywiwag Vbozfzbpqt9jikg6dy6t0j8ttrzw Usqp Cau
Source : pinterest.com
