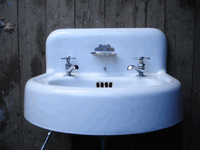
How To Remove Old Wall Mounted Sink

How To Remove A Wall Mounted Sink Wall Mounted Sink Sink Mom Diy

Pin By Kelli Hardesty On Home Ideas Bathroom Sink Storage Under Bathroom Sinks Wall Mounted Bathroom Sinks

Wall Mounted Sink Installation Wall Mounted Bathroom Sinks Utility Room Sinks Wall Mounted Sink

Image Result For P Trap For Wall Mounted Sink Vintage Vintage Sink Vintage Bathroom Sinks Antique Bathroom Sink

Whole Home News Home Repair Powder Room Remodel Pedestal Sink

Fascinating Vintage Wall Mount Bathroom Sink Antique Crane Wall Hung Sink Old Fashioned Wall Mounted Bathroom Si Wall Mounted Bathroom Sinks Sink Bathroom Sink

Step 1 access.
How to remove old wall mounted sink.

How To Remove Rust From A Stainless Steel Sink How To Remove Rust Stainless Steel Sinks Sink

If You Re Building A Farmhouse Or Looking To Remodel A Bathroom Here Are Some Fa Farmhouse Style Bathroom Vanity Farmhouse Sink Vanity Farmhouse Bathroom Sink

Pin By Deborah Rios On Small Kitchens Pinterest Kitchen Restoration Mold In Bathroom Wall Mounted Sink

Standard Shelfback Trim Sink Vintage Bathroom Sinks Vintage Sink

42 Cast Iron Wall Hung Kitchen Sink With Drainboard This Is Very Close To What The Origi Cast Iron Kitchen Sinks Kitchen Sink Remodel Farmhouse Sink Kitchen

Wall Mounted Sink New Life Diseno De Bano Principal Banos Hermosos Cuarto De Bano Moderno

The 34 Burleson Porcelain Wall Mount Sink Is Great For A Small Bathroom Or To Allow For The Height Necessary For Ada Co Wall Mounted Sink Wall Mounted Tv Sink

Kingston B Chrome Wall Mount Victorian Kitchen Faucet Sprayer Porcelain Handles Ks1241pxbs Victorian Kitchen Faucets Kitchen Faucet Wall Mount Kitchen Faucet

How To Repair The Surface Of An Enamel Sink Ehow Porcelain Sink Sink Bathroom Sink Tops

1950s Crane Burgundy Corner Sink 200 This Rare Wall Mount Sink Is In Flawless Condition Original Faucet And Drain Functioned P Vintage Sink Sink Old Sink

Pedestal Sink Installation Pedestal Sink Bathroom Renovation Cost Replace Bathtub Faucet

Antique Bathroom Faucets Vintage Bathroom Sinks Bathroom Faucets Bathroom Sink Fixtures

Paint Under Sink Pipes Black Sink Wall Mounted Sink Bathroom Redo

How To Clean And Remove Stains From An Old Cast Iron Sink Cleaning Hacks Clean Dishwasher House Cleaning Tips

Signature Hardware 414483 White 35 Janson Porcelain Wall Mount Bathroom Sink With Porcelain In 2020 Wall Mounted Bathroom Sinks Bathroom Sink Design Wall Mounted Sink

5 Favorites Architect Designed Bathroom Sinks Bathroom Sink Old Fashioned Bathtub Sink

Evolution Corner Pedestal Sink Pedestal Sinks Bathroom Sinks Bathroom Http Bit Ly 2gfpumq Corner Pedestal Sink Corner Sink Bathroom Modern Bathroom Sink

Narrow Small Wall Mount Bathroom Sink Installation Pedestal Narrow Small Bathroom Sinks Tiny Bathroom Sink Wall Mounted Bathroom Sinks
Https Encrypted Tbn0 Gstatic Com Images Q Tbn 3aand9gcqogxswzkzgthqzvkfde0gdutgelj9nvtk Q18eygl97kvqvvza Usqp Cau
Pin On Borten Bathroom Vanity

Small Wall Mount Bathroom Sink 12 4 X11 White Amazon Com In 2020 Wall Mounted Bathroom Sinks Sink Wall Mounted Sink

Small Powder Room With Shiplap Walls Cement Floor Tiles Wall Mounted Sink With Small Bathroom Sinks Powder Room Small Wall Mounted Bathroom Sinks

Gourmetier Gclws302019 30x20 Single Bowl Wall Mounted Sink White Kingston Brass In 2020 Wall Mounted Sink Round Mirror Bathroom Kingston Brass

Antique Vintage Kohler Bathroom Sink Wall Hung Cast Iron 1960s Taunton K 2731 Kohler Bathroom Sink Sink Bathroom Sink

New Small Wall Mount High Back Bath Sink Deep Basin 22 Etsy In 2020 Farm Sink Small Wall Bath Sinks

Pin On Bathroom Renovations

Antique Vintage American Standard Bathroom Sink Ledgewood Persian Brown 1960 S Sink Small Bathroom Pictures Luxury Bathroom Vanity

60 Cute Powder Rooms Ideas In 2020 Powder Room Small Powder Room Wall Mounted Taps

Wall Mounted Or With Metal Console Wash Basin Ceramic Bathroom Sink Duravit

Vilas Porcelain Wall Mount Sink Wall Mount Sinks Bathroom Sinks Bathroom Wall Mounted Sink Wall Mount Sinks Small Bathroom Sinks

Olney Porcelain Wall Mount Sink Bathroomsinks Olney Porcelain Sink Wallmount Wall Mounted Sink Wall Mounted Bathroom Sinks Wall Mount Sinks

Remove A Bathroom Mirror Large Bathroom Mirrors Diy Bathroom Bathroom Mirror Cabinet

Homemade Wall Mounted Bathroom Vanity Plans Available Bathroom Vanity Small Bathroom Remodel Designs Wall Mounted Vanity

Scanning The Marketplace For What S New On The Looks Old Department I Recently Spotted This Littl Vintage Bathroom Sinks Small Bathroom Sinks Retro Bathrooms

Ws Bath Collections Kerasan White Bathroom Wall Hung Sink Swan 3420 In 2020 Wall Mounted Bathroom Sinks Sink Modern Bathroom Sink

Antique Hand Carved Limestone Stone Sinks Trough Luxury Powder Room Powder Room Powder Room Small
Pin By Mayme Ercanbrack On Vintage Bathrooms Vintage Bathroom Sinks Farmhouse Bathroom Sink Bathroom Sink

Vitreous China 30 Wall Mounted Bathroom Sink With Images Wall Mounted Bathroom Sinks Sink Glass Sink

Corner Sink Fancy Bathroom White Subway Tile Bathroom

Bathroom Sinks Audrie Wall Mount Sink Wall Mount Bathroom Vanity Part Wall Mount Bathroom Sink Van Floating Bathroom Vanities Stylish Bathroom Washbasin Design

Wow Check Out This Hip Photo What An Original Design And Development Barrelsink Wall Mounted Bathroom Sinks Bathroom Sink Faucets Diy Bathroom Remodel

Glass Circular Vessel Bathroom Sink With Faucet Bathroom Sink Sink Wall Mounted Bathroom Sinks

Slate Floor Tile Wall Mounted Sink Google Search In 2020 Tiny Powder Rooms Powder Room Sink Bathroom Decor
Https Encrypted Tbn0 Gstatic Com Images Q Tbn 3aand9gctmb4qqo1wnxpqozgav4rqkrjgrdzskunyoybpsyw8kkubggkjb Usqp Cau
Source : pinterest.com
